Friday, 12 December 2008

wk 12:The actual conclusion

Captains log, Star date 569721: Well it has been an emotional journey, and as usual there were more than our fair share of problems but we won through in the end.

As regards my learning curve all I can say is that I am now a much better problem solver thanks to the amount of problems that he mobbed our group. Also the speed that I can model and animate is unreal, I genuinely think that I can do these two things 200% better than last semester. This was thanks to the fact that I had to spend days animating billions of characters...well nearly billions.

Although the workload was huge I am pleased with both mine and the rest of our groups progress and level of competence and even though we were riddled with illnesses and colds we got there in the end.

So in conclusion I am happy with my progress and I feel more than competent at 3D studio max and am really looking forward now to furthering my knowledge and animating more characters. Also having now seen the finished article I am well and truly impressed with the outcome. My only regret is that we had to compress it so much for it to export so excuse the pixelation.

wk 12: To conclude.

Captains log, Star date 569720: Before I round things up I am just going to show a bit about the mix down which went surprisingly well! In premier pro I imported all of the rendered scenes from max (I rendered to uncompressed in max in order to let premier do all of the compressing as I was advised by Chris as premier is better for that apparently!)

I also 'knocked' up a few YMCA posters under various genres to give it some diversity but they didn't seem to fit in any of the scenes so we used them at the end instead.

Then I found an arrow whoosh sound that was royalty free on the internet and using that I edited it to make it shorter and faster and added it to the introduction scene with the YMCA logo popping up.

After doing all of this the tables were set for a quick mixdown (and it was quick,but good) and a render .... therein lies the problem. It would seem that the 'friday week 12' virus has struck again reaking havoc throughout all uni computers. Once the mixdown was finished we went to render but the Quad core uni computers ran out of memory! I tried more than one machine and my laptop rendered at around 15frames per 45minutes. This was unacceptable and no matter how much fiddling and altering of settings it just would not render. I even tried spliting them up into miniscule sections but that made no difference.

Then Amy made the suggestion of using Windows Movie Maker (MM), but me being the sceptical microsoft hater that I am was reluctant but we gave it a try and Baam it worked! Now obviously MM is no where near as advanced as Premiere pro (PP) so what I did was to render out each room/scene from MM with the sound and then in PP did one last final mixdown and after a quick-ish render our project is complete. Phew!


Thursday, 11 December 2008

wk 12: Another short tutorial.

Captains log, Star date 569719: Just incase no-one knows what I did to create my walking 'geezer' I'll give another demo on how I did it.

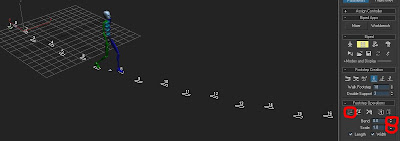
First I created a biped (I didn't bother altering the parameters for this demo):


Then I activated footsteps and clicke 'multiple footsteps'. After a little faffing I found that 25 steps was best for mine.

Then I clicked the create keys button and fiddled around with the bend and scale parameters till I achieved a movement to my liking.


And voila! fin:
Well wasn't that simple-with-no-actual-need-for-this-demo! I also saved a copy as a .bip file because the above procedure wasn't working on my characters so I made a dummy biped to create the animation then loaded the .bip file into my characters biped and it worked!

wk 12: So near and yet so far..

Captains log, Star date 569718: Now all of the rooms are modelled thanks to some clever merging from yours truly and all that was left was the chillout rooms. There were three of these in total and Matt animated the room with the guitarists playing with each other, whilst I did the drum session room (using Amy's drummer) and a general chatter room.

The rooms are a tiny bit bare but we agreed that this would contrast to the manic-ness of the loud music rooms. Below are a few shots of the chill out rooms, but you'll have to wait for the finished article to see the actual videos.


Below is one of my characters (called Matt) acting stupid in the first chillout room.

wk 12: a short tutorial

Captains log, Star date 569717: Its about time I actually showed what I did to get the cartoon effect rather than just allude to it.

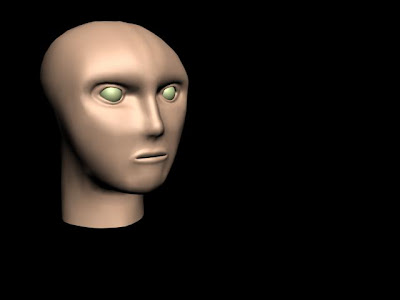
So to business. First fully model a head to perfection in 2 hours. Okay done that? Good, it should look something like this:


Step 2. Press 'm' to open the materials window, then click and drag the up arrow next to 'colour' to 100. The problem then becomes it is too bright so you may find yourself dimming the percentage to 50/60 to let a bit of shading come in. After this click the plain button next to Diffuse and add a Fallout map.


Step 3. Click the swap maps to make the black the outline, then change the lighter colour to a skinng colour.


Step 4. On the Mix Curve rollout click 'add point' add points and then adjust them to make sure there are No diagonal lines at all as these will create gradients which you don't want. You can tell because below is a bar with all of the colours and there should be no gradients there. Note my example has 3 colours but to add more colours simply add more horizontal lines.

Then click add material to selection.


Below on the right is the finished product, you can then add a material for the eyes as well. (I clicked the invert radio button and look! soooo cool he looks like ice man/silver surfer.


wk 12: The last legs...

Captains log, Star date 569716: Me, Matt and Amy presented our work so far on Tuesday, it was just a shame that we did not have all of our rooms rendered. We explained our storyboard and the concept of our advert which is simple and hopefully understand-abubble! It went okay but I felt that because it wasn't finished that we had to explain what was going on whereas when it is finished a good advert should speak for itself and not need explaining, that would only tell me that the creators were unclear or nervous if I was a client.

Below is a shot of my beloved characters! Matt's half of the room is not in this shot. Surprisingly 90% of my characters have unique animations, only two or three are copies. Animating them all individually makes for a very convincing crowd! I have included a couple of familiar faces fom the CAV course, see if you can spot them, (No wally isn't in there). Below are a couple of tasters for what they are getting up to in the crowd! Some are grooving some are jumping around whilst others are head banging or waving their arms.


Although it looks like I did more than half of the room, its the angle of the camera, apart from the 3 people in front of the stage the other half is very much empty and under Matt's jurisdiction.

I recorded the voice over yesterday on my home-studio which I have accumulated of a short period of my entire life! I went for the cheesy operator effect which is why I'm not posting the actual end svoice over on the blogger due to the fact that no-one needs to hear that kind of cheese. Below are a couple of shots of what I used to record my voice;
The PC on the left has all of my recording software on it (Cubase Studio 4) then my laptop has my 3D software so I was recording then moving it over to check that it all fits with the animation. On the left is my microphone which is a compressor mic, I used this to record my vocals onto the computer as the quality is exquisite.
Matt devised what was to be said as he is much better at wording things than me. So all I did was to record my vocals onto the computer, then fiddle about with a bit of reverb for effect (I ended up using Large Hard Wall Room) and experimented with a few pitch changes to see if I could make my voice sound less aweful (I failed) then export an audio mixdown and voila I'm done.

Below is my mixing desk which I used to make sure that the signal from the mic was strong, clear and free from hiss.

If your lucky I may give a short tutorial revealing my secret of ........(drum roll)..........cartoon material-ing stuff majiggy.

Monday, 8 December 2008

wk 12:They think its all over ... and they're absolutely right!

Captains log, Star date 569715: Woe is me when I found out that we had to present on the Tuesday cutting back on precious time. Unfortunately due to various ailments I have not seen our group together for about 2 weeks, which has been a pain because we have needed meet every weekday since week 11. Animating has been painfully slow these two weeks and I will go into detail on whats been happening on my next blog after I have rendered the scenes and had some sleep as I am about to complete a 18hour day sitting in front of a computer screen, but being me it will probably progress into about a 20hour day alas, this is not good when you are also feeling very rough due to certain people giving me their bugs!

Me and Matt turned out to be the only two slightly well enough to attend today (Monday). We worked all day and I alone managed to customise and animate 25 people for one scene so together we managed to get the scene together before getting kicked out at 10! So I am now rendering at home.

I will follow up from this blog after I regain my sanity ... I promise!

Friday, 5 December 2008

wk 11: The day the assassin attacked

Captains log, Star date 569714: It has a nice ring to it doesn't it? It is based on a true story, I might make an epic film out of it, Staring me as the only person who survives! because it would seem that my group is being picked off one by one! I am the only one left standing the other three members of my group are ill presumed dead. Thus I must battle on, facing this mammoth journey alone!

Nah just kidding! They are all ill but that hopefully won't stall us ... ... ... much ... ... ... okay maybe just a bit ......................... WE'RE DOOOOOOOOOOOOOOOOOOOMED AAAARRRRGGGHHHH.

Anyway hopefully we will have something to present on Tuesday if not then woops. I have been making character animations today in the hope of putting them into the Rock Room. I have successfully merged the band, but the crowd are giving me gyp. Every time I merge a character into the scene something goes wrong and its different each time.
Sometimes I won't be able to move them along a certain plane once they are in, sometimes I won't be able to rotate them without screwing them up and other times they won't move at all!
Its not as if it is a uniform problem it is just Max! I honestly wouldn't mind sitting there and separately animating 50 characters individually as long as they would import and move around properly but oooh nooo that's too much to ask when the deadline approaches. Oh and FYI screaming at the PC monitor doesn't work I've tried it. I think I'll try a hammer next.

Below are some animated characters (not it the scene) and the band (in the scene). The fact that none of us have been taught character animation I think we've done well and will form an effective raving crowd/mob! My characters are below, the other peeps in my group will upload their own creations.


How cookin' does this shot look!

Tuesday, 2 December 2008

wk 11: animé...tion

Captains log, Star date 569713: Now that our characters are fully modelled and boned its time to animate. Unfortunately Keeley was still ill so me, Matt and Amy each took a character to animate. Amy had the drummer as only the arms needed to move and she has never animated before so we didn't want to lumber her with a really complicated animation. Matt made two guitarists (a bassist and an electric guitarist). I made the lead singer.

The lead singer needed to have seamless animation as she was at the front of the stage and will be noticeable if there are any mistakes. The soundtrack we are using has no vocals so she doesn't need to sing but move-to-the-groove!

When I was animating her arm I discovered that part of her back was splaying out all over the place so the envelopes needed further editing (Matt had a similar problem to overcome for his guitarist).


Below is a shot of the curve editor. I finally got round to working out how to get sound into Max so I don't need to switch to and from Flash now! Sound has its own track and by selecting a waveform and importing the song it appeared and remained in the centre of the screen while I could work on object curves around it. This is a much easier process than before so the lines below show what my singer is getting up to in various angles! I decided to have her:

Hold the mic,
Tap one hand on her side to the beat,
Stamp her feet-to-the-beat,
Sway to the beat,
Rock her head as if improvising and;
bounce up and down gently to the beat as well.

This all required key framing exactly to the beat but thanks to the curve editor and the waveform I was able to have that up on one screen and edit the scene itself on another.


Below is the finished article of her on her own (note there are no materials on the mic hence the red colour!)


Major problemo!

I merged my singer into the scene once I had timed it all properly but woe is me she is too big, now usually I can just select her and resize her, but nay! thanks to bones which we all know and love this cannot be done because everything except the bones resizes, the bones remain but skew awkwardly messing it all up.

Its not as easy as it sounds because I spent a lot of time boning the lights so that they animate seamlessly as well but sizing the whole room up would have the same effect i.e. it would all size but the bones would turn weird! But I am not about to re-bone my character either, so what do I do?

The painful truth is that I have to re-bone all of my lights again after I have resize the room in every scene..again..from scratch..at the beginning...again..once more........waaaaaahhhh! This is the easiest way unfortunately because all of the characters are exactly the same so it would be better to leave them as they are.


Another problem thrown up by this is that the light beams will not size up properly either so that's another thing that I will have to redo! As you can see below the singer has her own little light partay!

wk 11: B-to-the-i-ped.

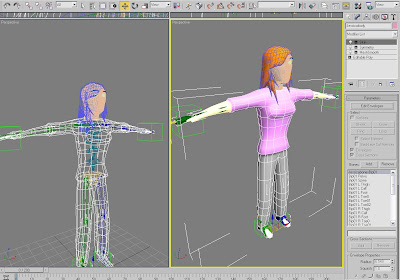
Captains log, Star date 569712: I am now going to explain what I did to bone the characters. It was a relatively simple exercise because all of the characters that we made so far are the same shape so I only needed to get the bones right on one then I could copy it for the rest.

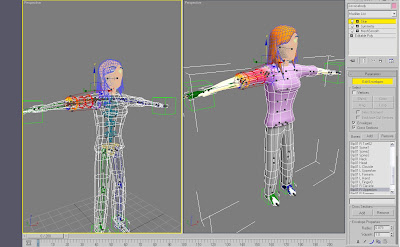
Firstly I used a biped as separate IK solvers would be more complicated and unnecessary. I drew out the Biped which can be found under create>systems>biped then I activated figure mode in the motion panel to let me edit each bone separately to get them all to the right size to fit the character. Once I had done this Matt ran some tests and found that there were areas that were not correct as the arm bone would move but leave half of the arm behind!


This was easily solved by editing the envelopes to enlarge them so that they encompass the whole arm. Now the body was fully working. The head was a separate object from the rest of the body so I simply linked it to the head bone so that when that moved the head and hair moved as well.


Animating a crowd could get sticky so I chose to add some dummy's to make it easier to move the hands and feet. Unfortunately dummy's can't just be linked to bones, I found this out after about 15minutes of screaming and the computer screen.

I did eventually find out how to do it which I will now explain.

First I drew a dummy and named it appropriately, for i.e. Jessicahanddummy (found under create>helpers>dummy)

Secondly I selected the hand bone and under the motions panel I expanded the KeyInfo properties drop down menu then I expanded the IK properties timeline. After this I clicked 'Select IK Object' and selected the dummy. I then clicked 'Create Key' (red dot) and set the type to Object and the IK blend to 1.0.

After I finished adjusting these settings I tested the dummy and the hand went with it! Amazing!


Tune in next time for some crazy animations...I hope!

Monday, 1 December 2008

wk 11: An army of ordinary people!

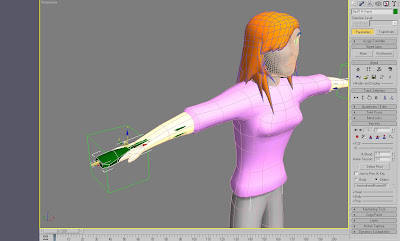
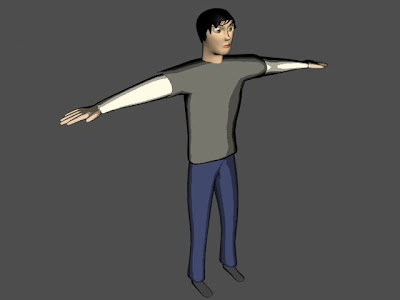
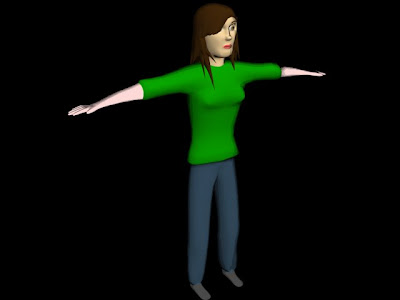
Captains log, Star date 569711: After a day of hard-slave labour me and Matt finished hair-cutting and dressing the characters. Would you like to meet them? Let me introduce Barry, Dave, Emmanuel, Gary, Moses, Fiona, Gabby, Jessica and Kate! Below are shots of them and How I boned them.


More importantly I made a short video to break up the monotonous hours of modelling!


Good old Microstar, Powerpod thingies! or was it Subbuteo?!

My next post will be explain how I boned each of the characters.

wk 11: Let there be life...ish!

Captains log, Star date 569710: From mere dirt/a box I have created life! Matt had modelled the body so I then went about making the head whilst Matt designed, styled and made some wigs to go ontop.

First using the humble box I added a Spherify modifier to transform it into a sphere.


After that I go the basic shape of a face in the side view, then I deleted one half of the face and added a symmetry modifier to save me some work as it duplicates for the other half of my head. Then by adjusting the vertex and adding a couple of extra edges in I fashioned a head as shown.


Then I extruded the eyes in to allow for eyeballs.


After creating spheres for eyes and ticking the NURMS dialogue I am left with an evil possessed alien!


Then in Photoshop I created the eye map by rendering some fibres an using polar co-ordinates to make it circular. Then I added a black circle and blurred it for the finishing touches.


Using a UVW Map I changed the dimensions of eye map so that it fitted around the eye correctly. Also I added a gloss on the material to give it a wet shine. The problem so far was that I was trying to hard to make the head look real. So I stopped and analysed some cartoon characters and altered the nose and made the eyes big to give a more cartoony look to the head, which looks a lot better than my previous alien!


I quite liked this! Simply by changing the self-illumination!


I then added my cartoon material which left some eery effects! This was clearly too bright, so I reduced the self-illumination a bit to include a touch of shading just to give the head some depth.


This is the result which I think looks a lot better thanks to the shadows round the cheek and eyes.


After 3 hours I had fully modelled a head, which to me seemed a lot easier than 6 weeks modelling a head?!? Below is one prototype character with one of Matt's wigs added on top.